


Table of contents

No headings in the article.
Docker containers are pure magic. They are very fast, and lightweight. But...How in the world networking work? When we add these containers to a host are they on their own network? Can we create more networks? Can we isolate them? Can we expose them?
There are seven different types of networks which can be deployed with Docker containers. In this blog we will take a look at five types of network.
To follow along with this blog you need to know what docker is and a host; A linux virtual machine where we can install Docker. Here I'll be using Ubuntu 22.04 LTS as OS.
1) Default network
Now lets jump into the terminal and look at out network interfaces.ip address show
Output for me is
1: lo: <LOOPBACK,UP,LOWER_UP> mtu 65536 qdisc noqueue state UNKNOWN group default qlen 1000
    link/loopback 00:00:00:00:00:00 brd 00:00:00:00:00:00
    inet 127.0.0.1/8 scope host lo
       valid_lft forever preferred_lft forever
    inet6 ::1/128 scope host
       valid_lft forever preferred_lft forever
2: wlp2s0: <BROADCAST,MULTICAST,UP,LOWER_UP> mtu 1500 qdisc noqueue state UP group default qlen 1000
    link/ether cc:6b:1e:5a:7b:93 brd ff:ff:ff:ff:ff:ff
    inet 192.168.52.189/24 brd 192.168.52.255 scope global dynamic noprefixroute wlp2s0
       valid_lft 2019sec preferred_lft 2019sec
    inet6 2401:4900:50a2:be84:a19f:f9af:e1a4:d2ef/64 scope global temporary dynamic
       valid_lft 3483sec preferred_lft 3483sec
    inet6 2401:4900:50a2:be84:beed:9c45:6c2d:11ce/64 scope global dynamic mngtmpaddr noprefixroute
       valid_lft 3483sec preferred_lft 3483sec
    inet6 fe80::9fc:90cb:bcce:5587/64 scope link noprefixroute
       valid_lft forever preferred_lft forever
3: docker0: <NO-CARRIER,BROADCAST,MULTICAST,UP> mtu 1500 qdisc noqueue state DOWN group default
    link/ether 02:42:30:6a:47:21 brd ff:ff:ff:ff:ff:ff
    inet 172.17.0.1/16 brd 172.17.255.255 scope global docker0
       valid_lft forever preferred_lft forever
We have loop back interface and then main interface connecting us to our home network. But what is docker0?
Docker0 is a new virtual bridge interface. It is the default interface and network for the default bridge (the default network and docker).
Let's run this command, this will list our current docker networks.
sudo docker network ls
The output is something like this
NETWORK ID     NAME      DRIVER    SCOPE
39e69177fb39   bridge    bridge    local
0b4b4acc5aa4   host      host      local
4717db76952b   none      null      local
We know "bridge" right here. But we don't know host and null. We will have a look at them soon. They are two of the seven networks in docker.
Notice the section called Driver. Driver basically means network type. So our bridge network is named bridge and its type is also bridge.
Now what if we deploy some containers in our default network?
We will use this command
sudo docker run -itd --rm --name container1 busybox
sudo docker run -itd --rm --name container2 busybox
sudo docker run -itd --rm --name container3 nginx
To make sure that the images are up we use this command
sudo docker ps
Output:-
CONTAINER ID   IMAGE     COMMAND                  CREATED              STATUS              PORTS     NAMES
9572a7554911   nginx     "/docker-entrypoint.…"   About a minute ago   Up About a minute   80/tcp    container3
edf3d34520ae   busybox   "sh"                     About a minute ago   Up About a minute             container2
0b090aed1589   busybox   "sh"                     2 minutes ago        Up 2 minutes                  container1
Now, when we deployed our containers, did we specified anything about networking at all? No. We let it do it by default. So it got thrown into our default bridge network. When we deployed those containers in the default network, docker automatically created three virtual ethernet interfaces and connected it to the docker0 bridge. It kind of act like a switch. There is a virtual ethernet interface for each container.
If we run ip address show again, it will show three new interfaces.
1: lo: <LOOPBACK,UP,LOWER_UP> mtu 65536 qdisc noqueue state UNKNOWN group default qlen 1000
    link/loopback 00:00:00:00:00:00 brd 00:00:00:00:00:00
    inet 127.0.0.1/8 scope host lo
       valid_lft forever preferred_lft forever
    inet6 ::1/128 scope host
       valid_lft forever preferred_lft forever
2: wlp2s0: <BROADCAST,MULTICAST,UP,LOWER_UP> mtu 1500 qdisc noqueue state UP group default qlen 1000
    link/ether cc:6b:1e:5a:7b:93 brd ff:ff:ff:ff:ff:ff
    inet 192.168.52.189/24 brd 192.168.52.255 scope global dynamic noprefixroute wlp2s0
       valid_lft 2232sec preferred_lft 2232sec
    inet6 2401:4900:50a2:be84:a19f:f9af:e1a4:d2ef/64 scope global temporary dynamic
       valid_lft 3198sec preferred_lft 3198sec
    inet6 2401:4900:50a2:be84:beed:9c45:6c2d:11ce/64 scope global dynamic mngtmpaddr noprefixroute
       valid_lft 3198sec preferred_lft 3198sec
    inet6 fe80::9fc:90cb:bcce:5587/64 scope link noprefixroute
       valid_lft forever preferred_lft forever
3: docker0: <BROADCAST,MULTICAST,UP,LOWER_UP> mtu 1500 qdisc noqueue state UP group default
    link/ether 02:42:30:6a:47:21 brd ff:ff:ff:ff:ff:ff
    inet 172.17.0.1/16 brd 172.17.255.255 scope global docker0
       valid_lft forever preferred_lft forever
    inet6 fe80::42:30ff:fe6a:4721/64 scope link
       valid_lft forever preferred_lft forever
5: vethc88ce7d@if4: <BROADCAST,MULTICAST,UP,LOWER_UP> mtu 1500 qdisc noqueue master docker0 state UP group default
    link/ether 7e:15:d5:da:9e:7c brd ff:ff:ff:ff:ff:ff link-netnsid 0
    inet6 fe80::7c15:d5ff:feda:9e7c/64 scope link
       valid_lft forever preferred_lft forever
7: veth52546bb@if6: <BROADCAST,MULTICAST,UP,LOWER_UP> mtu 1500 qdisc noqueue master docker0 state UP group default
    link/ether 82:4b:fc:10:44:97 brd ff:ff:ff:ff:ff:ff link-netnsid 1
    inet6 fe80::804b:fcff:fe10:4497/64 scope link
       valid_lft forever preferred_lft forever
9: vethb942cb5@if8: <BROADCAST,MULTICAST,UP,LOWER_UP> mtu 1500 qdisc noqueue master docker0 state UP group default
    link/ether e2:9f:02:22:df:c4 brd ff:ff:ff:ff:ff:ff link-netnsid 2
    inet6 fe80::e09f:2ff:fe22:dfc4/64 scope link
       valid_lft forever preferred_lft forever
If we run this command, it will show there name and that they are connect to docker0
bridge link
Output:-
5: vethc88ce7d@if4: <BROADCAST,MULTICAST,UP,LOWER_UP> mtu 1500 master docker0 state forwarding priority 32 cost 2
7: veth52546bb@if6: <BROADCAST,MULTICAST,UP,LOWER_UP> mtu 1500 master docker0 state forwarding priority 32 cost 2
9: vethb942cb5@if8: <BROADCAST,MULTICAST,UP,LOWER_UP> mtu 1500 master docker0 state forwarding priority 32 cost 2
Bridge not only created virtual ethernet interfaces, but also allocated IP addresses. Let's dive into the bridge network with this command
sudo docker inspect bridge
Output:-
[
    {
        "Name": "bridge",
        "Id": "39e69177fb39d5f46405f0b2bb2eb30f78397756fa88a623efb36845c78929ba",
        "Created": "2022-08-17T11:31:01.690732686+05:30",
        "Scope": "local",
        "Driver": "bridge",
        "EnableIPv6": false,
        "IPAM": {
            "Driver": "default",
            "Options": null,
            "Config": [
                {
                    "Subnet": "172.17.0.0/16",
                    "Gateway": "172.17.0.1"
                }
            ]
        },
        "Internal": false,
        "Attachable": false,
        "Ingress": false,
        "ConfigFrom": {
            "Network": ""
        },
        "ConfigOnly": false,
        "Containers": {
            "0b090aed15894615edc971e0d7fc717215507f8ef282710985e84425022ebc4f": {
                "Name": "container1",
                "EndpointID": "5c7e3f3751f513740f43982d263889042d08137fe0ea01fc86a71fc6e2545b40",
                "MacAddress": "02:42:ac:11:00:02",
                "IPv4Address": "172.17.0.2/16",
                "IPv6Address": ""
            },
            "9572a7554911d4ac23164d856484f48c39e6a81a3fb85cd5d9ef849303a7d832": {
                "Name": "container3",
                "EndpointID": "61c524a18b8803e077f0b3e765c23c8d5fc58524c352686802d17f2f80e39c5a",
                "MacAddress": "02:42:ac:11:00:04",
                "IPv4Address": "172.17.0.4/16",
                "IPv6Address": ""
            },
            "edf3d34520ae79ec97fcaa637708d1fd5f507954eeb33836cc35587ea01f70a1": {
                "Name": "container2",
                "EndpointID": "c1c66915c533d9dc95d2168c53deeb24e832a912e541539cbaadb9a55cb9544e",
                "MacAddress": "02:42:ac:11:00:03",
                "IPv4Address": "172.17.0.3/16",
                "IPv6Address": ""
            }
        },
        "Options": {
            "com.docker.network.bridge.default_bridge": "true",
            "com.docker.network.bridge.enable_icc": "true",
            "com.docker.network.bridge.enable_ip_masquerade": "true",
            "com.docker.network.bridge.host_binding_ipv4": "0.0.0.0",
            "com.docker.network.bridge.name": "docker0",
            "com.docker.network.driver.mtu": "1500"
        },
        "Labels": {}
    }
]
You can see that each container has its own ip address in that same docker0 network. It has DNS. And because the docker0 acts like a switch, the containers can talk to each other.
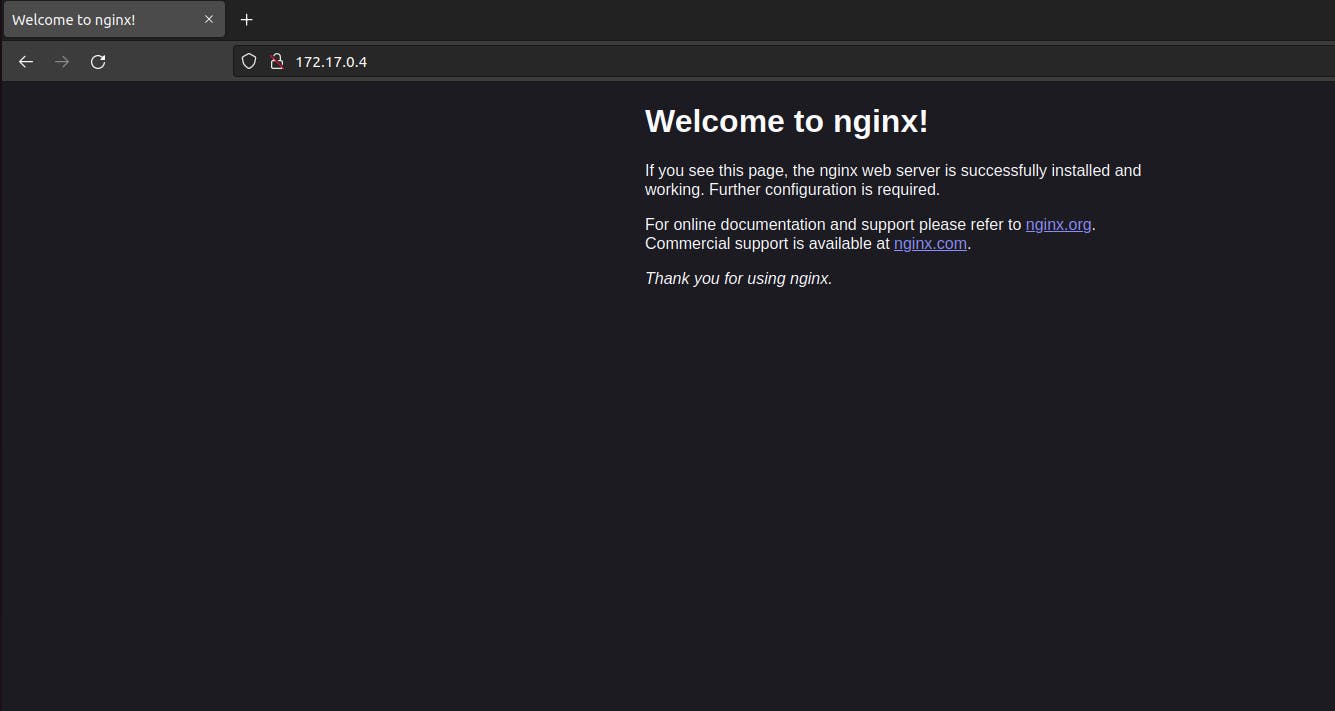
We installed nginx which by default is a website and it will use port 80. Now, can we reach that website? In other words, can my computer can access that web server?
The answer is no. This is the limitation of the bridge network. If you want to access any of the services that your docker containers offer (website in this case), it won't work by default. You have to manually expose those ports.
So let's expose port 80 to allow us to access and after that we have to redeploy container3.
First remove the container3 with the help of this command
sudo docker stop container3
Then redeploy it with but this time by doing port mapping, telling docker to expose the container's port 80 to the host port 80.
sudo docker run -itd --rm -p 80:80 --name container3 nginx
Let's run this command to check what ports are being exposed
sudo docker ps
Output:-
CONTAINER ID   IMAGE     COMMAND                  CREATED          STATUS          PORTS                               NAMES
252c2de84f26   nginx     "/docker-entrypoint.…"   50 seconds ago   Up 49 seconds   0.0.0.0:80->80/tcp, :::80->80/tcp   container3
edf3d34520ae   busybox   "sh"                     53 minutes ago   Up 53 minutes                                       container2
0b090aed1589   busybox   "sh"                     54 minutes ago   Up 54 minutes
Now we can see that now the website is running on our host machine.
 It is not recommended to use default network but instead make you own network.
2) User-Defined Bridge
This network is pretty much exactly like the default bridge. The name itself suggests that you're making it. You have to create your own network.Let's create our own network. Run this command
sudo docker network created tom
And that's it. Network created
If we check the list of docker networks by running command sudo docker network ls, it will show a network named tom
NETWORK ID     NAME      DRIVER    SCOPE
39e69177fb39   bridge    bridge    local
0b4b4acc5aa4   host      host      local
4717db76952b   none      null      local
4a17276f3a0f   tom       bridge    local
If we run ip address show, we will see a new virtual bridge is being created with a new network.
1: lo: <LOOPBACK,UP,LOWER_UP> mtu 65536 qdisc noqueue state UNKNOWN group default qlen 1000
    link/loopback 00:00:00:00:00:00 brd 00:00:00:00:00:00
    inet 127.0.0.1/8 scope host lo
       valid_lft forever preferred_lft forever
    inet6 ::1/128 scope host
       valid_lft forever preferred_lft forever
2: wlp2s0: <BROADCAST,MULTICAST,UP,LOWER_UP> mtu 1500 qdisc noqueue state UP group default qlen 1000
    link/ether cc:6b:1e:5a:7b:93 brd ff:ff:ff:ff:ff:ff
    inet 192.168.52.189/24 brd 192.168.52.255 scope global dynamic noprefixroute wlp2s0
       valid_lft 2303sec preferred_lft 2303sec
    inet6 2401:4900:50a2:be84:a19f:f9af:e1a4:d2ef/64 scope global temporary dynamic
       valid_lft 3430sec preferred_lft 3430sec
    inet6 2401:4900:50a2:be84:beed:9c45:6c2d:11ce/64 scope global dynamic mngtmpaddr noprefixroute
       valid_lft 3430sec preferred_lft 3430sec
    inet6 fe80::9fc:90cb:bcce:5587/64 scope link noprefixroute
       valid_lft forever preferred_lft forever
3: docker0: <BROADCAST,MULTICAST,UP,LOWER_UP> mtu 1500 qdisc noqueue state UP group default
    link/ether 02:42:30:6a:47:21 brd ff:ff:ff:ff:ff:ff
    inet 172.17.0.1/16 brd 172.17.255.255 scope global docker0
       valid_lft forever preferred_lft forever
    inet6 fe80::42:30ff:fe6a:4721/64 scope link
       valid_lft forever preferred_lft forever
5: vethc88ce7d@if4: <BROADCAST,MULTICAST,UP,LOWER_UP> mtu 1500 qdisc noqueue master docker0 state UP group default
    link/ether 7e:15:d5:da:9e:7c brd ff:ff:ff:ff:ff:ff link-netnsid 0
    inet6 fe80::7c15:d5ff:feda:9e7c/64 scope link
       valid_lft forever preferred_lft forever
7: veth52546bb@if6: <BROADCAST,MULTICAST,UP,LOWER_UP> mtu 1500 qdisc noqueue master docker0 state UP group default
    link/ether 82:4b:fc:10:44:97 brd ff:ff:ff:ff:ff:ff link-netnsid 1
    inet6 fe80::804b:fcff:fe10:4497/64 scope link
       valid_lft forever preferred_lft forever
11: vethb9e82de@if10: <BROADCAST,MULTICAST,UP,LOWER_UP> mtu 1500 qdisc noqueue master docker0 state UP group default
    link/ether 96:29:18:b8:e1:21 brd ff:ff:ff:ff:ff:ff link-netnsid 2
    inet6 fe80::9429:18ff:feb8:e121/64 scope link
       valid_lft forever preferred_lft forever
12: br-4a17276f3a0f: <NO-CARRIER,BROADCAST,MULTICAST,UP> mtu 1500 qdisc noqueue state DOWN group default
    link/ether 02:42:de:2b:a2:38 brd ff:ff:ff:ff:ff:ff
    inet 172.18.0.1/16 brd 172.18.255.255 scope global br-4a17276f3a0f
       valid_lft forever preferred_lft forever
Let's run a few containers inside this network
sudo docker run -itd --rm --network tom --name loki busybox
sudo docker run -itd --rm --network tom --name jerry busybox
Now if we do ip address show, we see we have virtual interfaces created.
1: lo: <LOOPBACK,UP,LOWER_UP> mtu 65536 qdisc noqueue state UNKNOWN group default qlen 1000
    link/loopback 00:00:00:00:00:00 brd 00:00:00:00:00:00
    inet 127.0.0.1/8 scope host lo
       valid_lft forever preferred_lft forever
    inet6 ::1/128 scope host
       valid_lft forever preferred_lft forever
2: wlp2s0: <BROADCAST,MULTICAST,UP,LOWER_UP> mtu 1500 qdisc noqueue state UP group default qlen 1000
    link/ether cc:6b:1e:5a:7b:93 brd ff:ff:ff:ff:ff:ff
    inet 192.168.52.189/24 brd 192.168.52.255 scope global dynamic noprefixroute wlp2s0
       valid_lft 1841sec preferred_lft 1841sec
    inet6 2401:4900:50a2:be84:a19f:f9af:e1a4:d2ef/64 scope global temporary dynamic
       valid_lft 3565sec preferred_lft 3565sec
    inet6 2401:4900:50a2:be84:beed:9c45:6c2d:11ce/64 scope global dynamic mngtmpaddr noprefixroute
       valid_lft 3565sec preferred_lft 3565sec
    inet6 fe80::9fc:90cb:bcce:5587/64 scope link noprefixroute
       valid_lft forever preferred_lft forever
3: docker0: <BROADCAST,MULTICAST,UP,LOWER_UP> mtu 1500 qdisc noqueue state UP group default
    link/ether 02:42:30:6a:47:21 brd ff:ff:ff:ff:ff:ff
    inet 172.17.0.1/16 brd 172.17.255.255 scope global docker0
       valid_lft forever preferred_lft forever
    inet6 fe80::42:30ff:fe6a:4721/64 scope link
       valid_lft forever preferred_lft forever
5: vethc88ce7d@if4: <BROADCAST,MULTICAST,UP,LOWER_UP> mtu 1500 qdisc noqueue master docker0 state UP group default
    link/ether 7e:15:d5:da:9e:7c brd ff:ff:ff:ff:ff:ff link-netnsid 0
    inet6 fe80::7c15:d5ff:feda:9e7c/64 scope link
       valid_lft forever preferred_lft forever
7: veth52546bb@if6: <BROADCAST,MULTICAST,UP,LOWER_UP> mtu 1500 qdisc noqueue master docker0 state UP group default
    link/ether 82:4b:fc:10:44:97 brd ff:ff:ff:ff:ff:ff link-netnsid 1
    inet6 fe80::804b:fcff:fe10:4497/64 scope link
       valid_lft forever preferred_lft forever
11: vethb9e82de@if10: <BROADCAST,MULTICAST,UP,LOWER_UP> mtu 1500 qdisc noqueue master docker0 state UP group default
    link/ether 96:29:18:b8:e1:21 brd ff:ff:ff:ff:ff:ff link-netnsid 2
    inet6 fe80::9429:18ff:feb8:e121/64 scope link
       valid_lft forever preferred_lft forever
12: br-4a17276f3a0f: <BROADCAST,MULTICAST,UP,LOWER_UP> mtu 1500 qdisc noqueue state UP group default
    link/ether 02:42:de:2b:a2:38 brd ff:ff:ff:ff:ff:ff
    inet 172.18.0.1/16 brd 172.18.255.255 scope global br-4a17276f3a0f
       valid_lft forever preferred_lft forever
    inet6 fe80::42:deff:fe2b:a238/64 scope link
       valid_lft forever preferred_lft forever
14: veth61ad963@if13: <BROADCAST,MULTICAST,UP,LOWER_UP> mtu 1500 qdisc noqueue master br-4a17276f3a0f state UP group default
    link/ether 62:ef:e3:9c:0f:6d brd ff:ff:ff:ff:ff:ff link-netnsid 3
    inet6 fe80::60ef:e3ff:fe9c:f6d/64 scope link
       valid_lft forever preferred_lft forever
16: veth133cc0f@if15: <BROADCAST,MULTICAST,UP,LOWER_UP> mtu 1500 qdisc noqueue master br-4a17276f3a0f state UP group default
    link/ether 3e:be:1f:7a:b6:7c brd ff:ff:ff:ff:ff:ff link-netnsid 4
    inet6 fe80::3cbe:1fff:fe7a:b67c/64 scope link
       valid_lft forever preferred_lft forever
And if we look at our bridge link, we see those new interfaces connected to that new virtual bridge.
5: vethc88ce7d@if4: <BROADCAST,MULTICAST,UP,LOWER_UP> mtu 1500 master docker0 state forwarding priority 32 cost 2
7: veth52546bb@if6: <BROADCAST,MULTICAST,UP,LOWER_UP> mtu 1500 master docker0 state forwarding priority 32 cost 2
11: vethb9e82de@if10: <BROADCAST,MULTICAST,UP,LOWER_UP> mtu 1500 master docker0 state forwarding priority 32 cost 2
14: veth61ad963@if13: <BROADCAST,MULTICAST,UP,LOWER_UP> mtu 1500 master br-4a17276f3a0f state forwarding priority 32 cost 2
16: veth133cc0f@if15: <BROADCAST,MULTICAST,UP,LOWER_UP> mtu 1500 master br-4a17276f3a0f state forwarding priority 32 cost 2
We can inspect that network using sudo docker inspect tom we get:
[
    {
        "Name": "tom",
        "Id": "4a17276f3a0fbf55ca184c6eaf03016f88629c92a172647471429d3c3e9f51e3",
        "Created": "2022-08-17T20:31:12.910872226+05:30",
        "Scope": "local",
        "Driver": "bridge",
        "EnableIPv6": false,
        "IPAM": {
            "Driver": "default",
            "Options": {},
            "Config": [
                {
                    "Subnet": "172.18.0.0/16",
                    "Gateway": "172.18.0.1"
                }
            ]
        },
        "Internal": false,
        "Attachable": false,
        "Ingress": false,
        "ConfigFrom": {
            "Network": ""
        },
        "ConfigOnly": false,
        "Containers": {
            "1e2dfd713e0b43a500b8064464b8d506ff03627f6d3e59ab2ad369bd7395a7e1": {
                "Name": "loki",
                "EndpointID": "75751a3622caac5f8e1b2c85b860a4bfd01b9c6c1f4a6dc49105ae7bd9ad2df5",
                "MacAddress": "02:42:ac:12:00:02",
                "IPv4Address": "172.18.0.2/16",
                "IPv6Address": ""
            },
            "d3b48638734122961e50a72ee82dde566906d6aafae7b112f21ff45aa5bc2af1": {
                "Name": "jerry",
                "EndpointID": "dab02cd5bc96fb657faacb0dbcf144ffef920c6284a97ff09ad724c8107102f7",
                "MacAddress": "02:42:ac:12:00:03",
                "IPv4Address": "172.18.0.3/16",
                "IPv6Address": ""
            }
        },
        "Options": {},
        "Labels": {}
    }
]
We prefer this network over default network. Reason? Because of the isolation. This tom network is isolated/protected from the default network. They can't talk to each other. Network isolation is very important. You have to isolate your workloads and this is why docker recommends a user-defined bridge.
3) Host network
We created container3 operating at port 80. Let's delete it and redeploy it on a host network.Stop container by this command:
sudo docker stop container3, then run this command sudo docker run -itd --rm --network host --name container3 nginx
When you deploy a container to the host network, it doesn't even really have its own network. It bums off the host. It shares its IP address and ports. This means that you don't have to expose any ports. Now nginx can run as a regular application on the host without port mapping, even though it is inside a container.
 The downtime of this network is that there is no isolation. It's like right there next to the host.
4) Macvlan network
What if we could erase all of these stuff, all the complications, all the docker networks and the virtual ethernet interfaces, the separate networks and simply connect the docker containers directly to our physical network. That's what macvlan about. It would be like their ethernet interfaces are connected directly to the switch in my house. They even get thier own mac addresses. Also they will have their own IP addresses on my home network. They are acting like virtual machines.Let's create our macvlan network.
sudo docker network create -d macvlan --subnet 192.168.239.0/24 --gateway 192.168.239.12 -o parent=wlp2s0 macvlan
What is parent=wlp2s0?
Here we have to tie our macvlan to our host network interface. The main interface of my ubuntu machine is wlp2s0. Check yours by doing ip address show. You must tie your macvlan network to a physical network.
Now lets do sudo docker network ls
NETWORK ID     NAME      DRIVER    SCOPE
ed28e5c4ce86   bridge    bridge    local
0b4b4acc5aa4   host      host      local
10d74c0e21fe   macvlan   macvlan   local
4717db76952b   none      null      local
4a17276f3a0f   tom       bridge    local
Here we go. We can see a new network named macvlan of type macvlan is created.
Now let's run some containers inside macvlan network.
sudo docker run -itd --rm --network macvlan --ip 192.168.239.23 --name jerry busybox
Now jerry is connected to macvlan network like a regular virtual machine.
In macvlan network, all the docker containers get their own mac addresses. Now where that becomes an issue is your network may not be able to have multiple mac addresses on one switch port. The cable connection is sharing a port with the host. They're all connected to the same port which will see multiple mac addresses and a lot of times port can't handle that. It might have port security, which says you can have one or maybe two mac addresses on one port and that breaks things. You will often see this called promiscuous mode. If you want to try this, you will need that enabled.
Let's first try with the host. We have to actually enable promiscuous mode on its network interface.
Run this command:
sudo ip link set wlp2s0 promisc on
Now lets see if it worked. Run this command and ping 192.168.239.23
sudo docker exec -it jerry sh
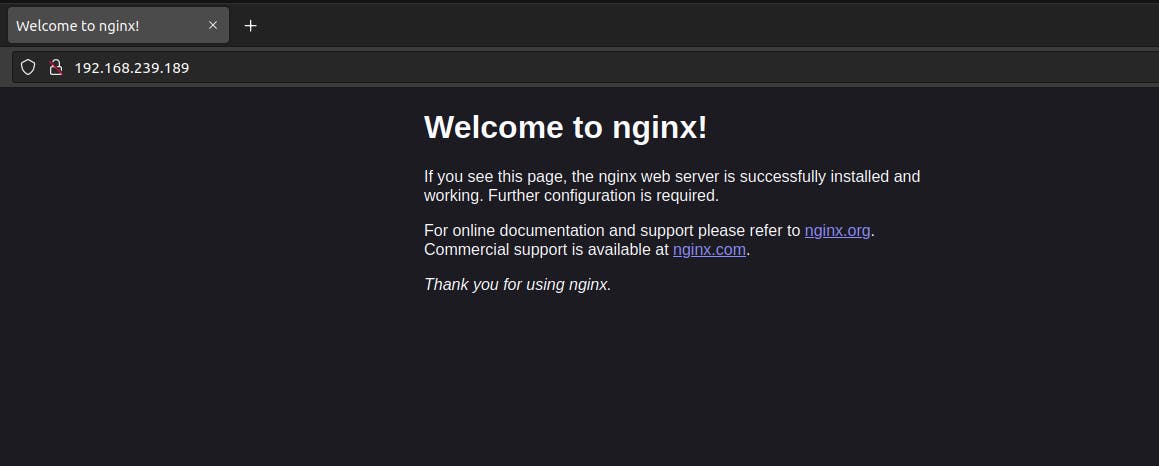
The macvlan has all the benefits of a bridge network, except its directly connected to your home network. If we deploy a web server in a macvlan, we don't have to expose any ports.
Macvlan has its downsides. That whole mac address thing happened to have promiscuous mode, which you may have no control over and the IP address thing, no dhcp. You would expect that if you connect your device directly to your home network, it will get an IP address from your router whatever that's offering dhcp. But no. If you don't specify an IP address when you deploy your container, docker will choose one for you. Docker will use its own dhcp and assign like 192.168.238.4 or 192.168.238.5 or anything which could create a litter conflict because you got two dhcp servers in your network. So in that scenario, just specify your IP address with every container.
Now let's talk about our next network.
5) Ipvlan network
This one solves the problem withmacvlans, that promiscuous stuff. Ipvlan network has two different modes, L2 and L3. We will focus on L2 because it's pretty much same as macvlan with one difference and it solves our problem.
We have jerry and loki in a macvlan and they are assigned their own mac address. But it messes with our switches and the promiscuous stuff. Ipvlan allow the host to share its mac address with the containers. So the mac address of jerry and loki will match exactly to the host, but they will still have IP addresses on our network. This seems to resolve all issues.
Let's create ipvlan network
sudo docker network create -d ipvlan --subnet 192.168.239.0/24 --gateway 192.168.239.12 -o parent=wlp2s0 ipvlan
Now add new container:
sudo docker run -itd --rm --network ipvlan --ip 192.168.239.20 --name kashish busybox